Categories: Electrician at home, Sockets and switches
Number of views: 64159
Comments on the article: 2
Armature for mounting sockets and switches
 The electrics in an apartment for most of its inhabitants are, first of all, numerous switches and sockets. As a rule, there are too many of them. But neither sockets nor switches are hanging in the air - they need to be somehow fixed to the wall.
Sockets and switches are of two types: for hidden and for open wiring. Accordingly, depends on the method of wiring way to install sockets and switches. The final choice of devices for installation, that is, reinforcement, also depends on the material of the walls on which the installation is carried out. Under certain conditions, it is even possible to install, as they say, “without everything,” that is, simply onto a wall.
So, we will consider how to install sockets and switches depending on the type of wiring.
1. Installation of sockets and switches with open wiring
For open wiring the main thing is the material and quality of the walls. If the wall is flat and non-combustible, for example, brick or concrete, or if it is covered with tiles, then, mounting sockets and switches, it is quite possible to do without any fittings. Then we arm ourselves with a puncher and plastic dowels with self-tapping screws: the case is small. However, do not forget that it is not recommended to punch the tile with a drill: it will certainly burst.
We drill a tile by a drill on ceramics on the shock-free operating mode of a puncher. Plasterboard partitions stand apart. The dowel, designed for installation on drywall, has a special design and is called GKL.
If the wall on which you are installing the socket or switch consists of combustible material, or you are unable to level it (for example, the wall in the garage is made of sloppy brick), then you can not do without fittings for sockets – insulating linings.
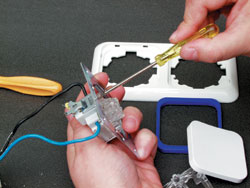
 In fact, many sockets and switches are sold complete with a similar lining of an elementary design: simply a piece of plastic to the size of the apparatus, isolating it from the wall. For a wooden wall, this is a safety measure in the event of a malfunction of the switch or an overloaded outlet. For a bumpy wall, the lining creates an even area to which the socket or switch fits as tightly as possible.
For sockets and switches that are not equipped with regular linings, you can buy individual ones. Moreover, among them there are pads of a more complex design, which are already a special platform with mounting holes for installing a socket / switch, a hole for outputting a cable to a socket and its own standard input.
Such a lining contributes to the aesthetics of mounting a socket or switch, although they slightly increase their dimensions. Of course, it is possible to purchase such pads for single outlets and switches, as well as for double socket outlets and socket-switch units.
Of course, insulating linings are only required for installation on walls made of combustible materials - in other cases, their role is purely decorative. Until recently, an ordinary piece of plywood was often used instead. But plywood, of course, does not perform any protective functions, and it does not always fit well into the interior.
2. Installation of sockets and switches with hidden wiring
First of all, if we install hidden wiring, no one bothers us to use sockets and switches for open wiring. Then it is quite possible to use the same insulating linings.
But the appearance of sockets and switches, pretty sticking out, not everyone likes. Therefore, most often for hidden wiring appropriate devices and connectors are used.

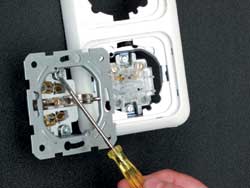
Sockets and switches for concealed wiring are mounted in two ways: using the screws included in the fittings (socket box), or using the spacer tabs, which are again opened by the screws, but already from the apparatus. Most sockets and switches are universal: they can be mounted in both ways. But some provide only one installation method, and this should be paid attention to.
In a solid wall, a socket / switch with paws can be mounted without sockets, if the wall is not wooden, of course. For installation, then we pierce a blind hole in the wall with a crown to the required depth, insert a socket there, burst the paws and close the case.
The bad thing about this installation is that then the plug from the outlet will be pulled from time to time without holding the outlet in the hole, and this will turn out to mean that the outlet starts to fall out over time. There are no such troubles with the switch.
Fastening with screws is more reliable, but here you can not do without a socket. The technology is this: a hole punched with a crown in the wall, we coat with alabaster (gypsum), then we insert the socket and after drying, we attach a socket or switch to the screws, and then the case. This installation method is by far the most popular.
Used to be widely used wall plugs for solid walls under spacer legs, without screws. These were ordinary plastic or metal “glasses”. Their advantage over a simple hole in the wall is that they do not crumble under the pressure of the legs, as does brick or concrete. Therefore, the installation is more reliable. But today, all the same, these undergrowths are slowly becoming a thing of the past.
 For installation of sockets and switches for hidden wiring on partitions made of drywall or plywood special sockets. They are not fastened with alabaster, but with their special clamping legs. The socket / switch in them is mounted on screws, as well as in a solid wall.
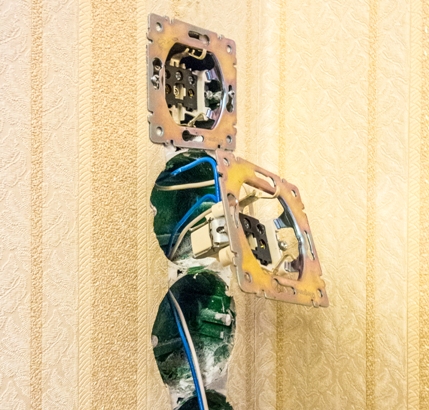
It is worth noting that the flush-mounted podrozetniki can be connected in blocks of several pieces in a row. For this are sold special connectors and external frames for up to five seats. This allows you to create complex blocks, for example, from several outlets and a switch.
In addition, in socket boxes for hidden wiring, you can install not only sockets and switches, but also TV, telephone and internet connectors, and floor heating regulators. Well and, of course, assemble vertical or horizontal blocks from this. It turns out just a real constructor.
Alexander Molokov
We recommend reading: Features of mounting sockets and switches on various surfaces, Proper wiring in drywall walls
See also at e.imadeself.com
:
