Categories: Sharing experience, All about LEDs
Number of views: 22162
Comments on the article: 2
How to check the LED
LED is a rather gentle semiconductor device. If the current through it P-N junction If it becomes critically larger than the nominal, then overheating will begin and the thermal destruction of the crystal will not take long. Therefore, before checking the LED for serviceability, be prepared to be very careful not to accidentally spoil the workpiece.
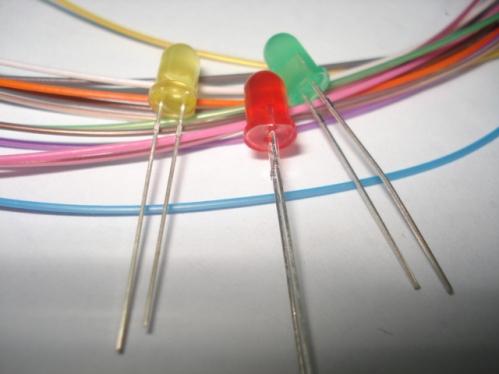
Small round LEDs are designed for an operating voltage in the range of 2 to 4 volts, namely: red, yellow and green - up to 2.2 volts, and white and blue - up to 3.6 volts. The operating rated current of a small round LED usually does not exceed 10 - 20 milliamps, keep this in mind.

Verification Method No. 1. 5 or 12 volt power supply and resistor
So, to check the LED, you first need to decide what you will use to check. If there is no multimeter at hand, then the first thing you can take is source of power with a known voltage ranging from 5 to 12 volts, but do not rush to connect an LED to it.
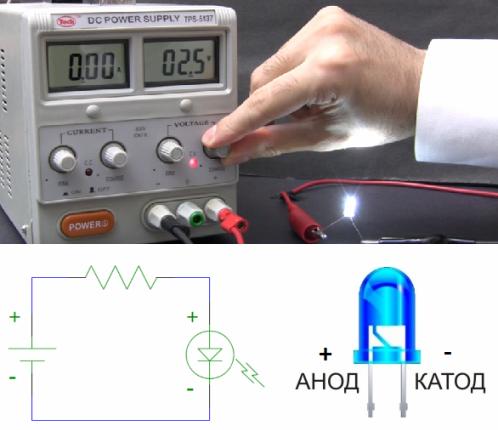
The next step will be to take resistorwhose rating will limit the current at a given voltage at the level of 5-10 mA. What does it mean? This means that if in a serial circuit with a resistor, the LED will have a voltage drop as needed - about 2 volts, then the resistor will have 3 or 10 volts (for a 5 or 12 volt power supply), therefore for a current of about 5 mA, according to the law Ohm, you need a 600 Ohm or 2000 Ohm resistor.
Choose a close rating from your existing ones, for example 560 Ohm or 2.2 kOhm - for a 5 or 12 volt power supply, respectively. Connect the LED through the resistor in series to the power source.

If you are dealing with a round or rectangular output LED, then its long leg connected to that internal electrode that looks smaller is the anode, it is connected to the plus of the power source. The short leg is to the minus of the power source, on its side the round lens of the LED near the base has a flat cut.
Connect the resistor to the long positive leg of the LED, and connect the entire circuit to the power source - for the short leg minus, for the resistor - plus. If the legs are cut off and it is not clear which one was long, then the minus is connected to the electrode, which appears larger inside the lens. So, if the LED is working, it will light up.
Verification Method No. 2. HFE multimeter

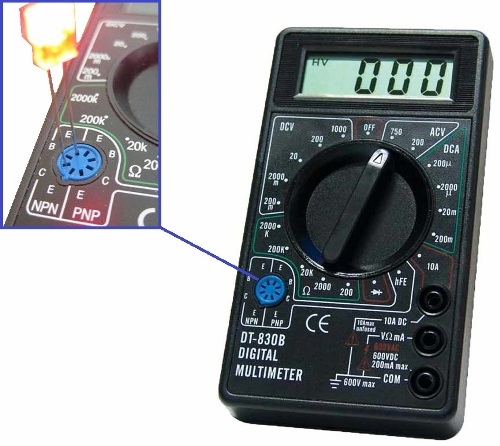
There is a second, very simple way to check the LED with legs, if you have on the farm multimeter with the function of measuring the parameters PNP and NPN transistors.
In this case, it is enough to insert the LED into the holes “C” and “E” of the transistor test socket: in the PNP connector with the long leg in “E”, the short one in “C”, or in the NPN connector with the long leg in “C” short - in "E".
A working LED will light up, because the device will apply a voltage of about 1.5 volts to it, which will be enough for a weak but visible light of the LED to understand that it is working.
Verification Method No. 3. LED diode with a multimeter as a regular diode

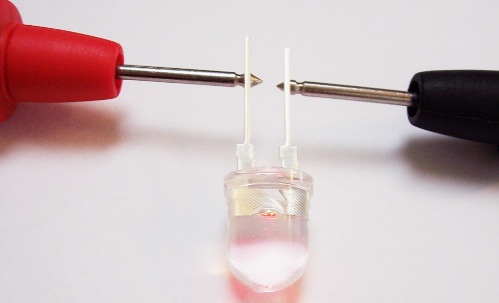
Finally, the third way. Since the LED is primarily a semiconductor diode, you can ring it like a regular diode. Just turn on the multimeter in the diode dialing mode, and check your LED by touching the terminals of the tester with its probes.
A working LED will even light up a little, and on the multimeter display you will see the value of the voltage drop at the P-N junction in volts. Of course, a powerful LED designed for a relatively high voltage can’t be checked like this, you will have to use the first method, but low-power and even SMD LEDs, can be easily checked in such a simple way, even with the conditions when they are tightly mounted on a printed circuit board.
See also at e.imadeself.com
:
